
Building an Interactive Z-Test Calculator with Streamlit: A Step-by-Step Guide
Hypothesis testing is a fundamental technique in statistics and data science used to assess claims about a population based on sample data. It has widespread applications across industries and domains – from clinical trials in healthcare to A/B testing in marketing to quality control in manufacturing.
For machine learning engineers and AI researchers in particular, hypothesis testing is an invaluable tool for model evaluation, feature selection, and making data-driven decisions. By using hypothesis tests to compare model performance metrics, validate assumptions, and spot significant patterns, ML practitioners can build more robust, reliable, and accurate systems.
One of the most commonly used hypothesis tests is the z-test, which evaluates whether the mean of a sample is statistically different from a known or hypothesized population mean. Specific applications of z-tests in AI/ML include:
- Comparing the accuracy of a trained model to a target benchmark
- Determining if a new feature significantly improves model performance
- Validating that a model‘s outputs match expected characteristics of the input data
- Detecting concept drift between a model‘s training and serving data
While z-tests are relatively straightforward to perform, the process can be time-consuming and tedious, especially when running multiple tests on different samples and features. That‘s where Streamlit comes in.
Streamlit is a popular open-source Python library for rapidly building interactive web apps for data science and machine learning. With just a few lines of code, you can create professional, customizable UIs for your Python scripts and ML models.
In this step-by-step tutorial, we‘ll walk through how to build an interactive z-test calculator app using Streamlit and Python. By the end, you‘ll be able to easily perform z-tests on your own data directly in your web browser. Let‘s dive in!
Understanding the Math Behind the Z-Test
Before we get to the coding, let‘s briefly review the key concepts and equations underlying the z-test. Feel free to skip this section if you‘re already familiar with the math.
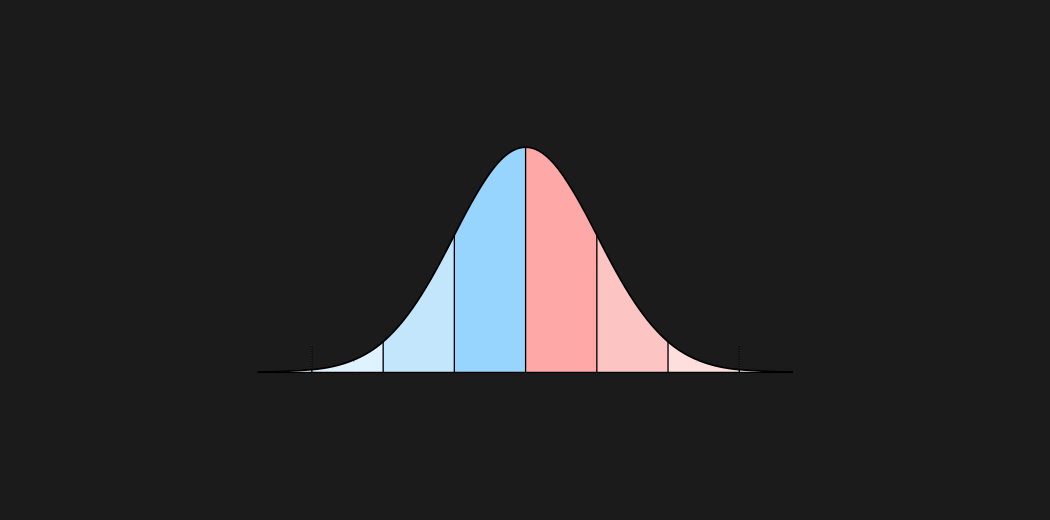
The z-test relies on the z-statistic, also known as the standard score, which measures how many standard deviations an observation or sample mean is from the population mean under the null hypothesis.
The equation for the z-statistic is:
z = (x̄ – μ) / (σ / √n)
Where:
- x̄ is the sample mean
- μ is the hypothesized population mean
- σ is the population standard deviation
- n is the sample size
Intuitively, the z-statistic represents the normalized distance between the sample and population means. The larger the absolute z-value, the more the sample deviates from the null hypothesis.
To perform the z-test, we calculate the z-statistic for our sample and compare it to a critical z-value (based on our chosen significance level α). If the absolute z-statistic exceeds the critical value, we reject the null hypothesis. Otherwise, we fail to reject the null.
The p-value represents the probability of observing a sample statistic as extreme as the test statistic under the null hypothesis. For the two-tailed z-test, the p-value is calculated as:
p = 2 × P(Z > |z|)
Where:
- P(Z > |z|) is the probability of observing a z-statistic greater than the absolute value of the calculated z
If the p-value is less than our significance level α, we reject the null hypothesis. Otherwise, we fail to reject the null.
It‘s important to note that the z-test makes several assumptions about the underlying data:
- Samples are drawn randomly from the population
- The sample size is sufficiently large (typically n > 30)
- The population standard deviation is known
- The data follow a normal distribution (or the sample size is large enough for the Central Limit Theorem to apply)
We‘ll revisit these assumptions in the context of our Streamlit app development. But first, let‘s get our environment set up!
Setting Up Our Streamlit Environment
To build our z-test calculator app, we‘ll need to have Python and Streamlit installed. If you don‘t already have Python, you can download it from the official website.
Once you have Python, you can install Streamlit using pip:
pip install streamlitWe‘ll also be using the NumPy library for some mathematical operations, so let‘s install that too:
pip install numpyNow create a new Python file for our app script (e.g. z_test_calculator.py). We‘re ready to start coding!
Building the App Step-by-Step
Step 1: Importing Libraries and Setting Up the App
First, let‘s import the necessary libraries and set up the basic structure of our Streamlit app:
import streamlit as st
import numpy as np
from scipy import stats

st.title(‘Interactive Z-Test Calculator‘)
st.write(‘This app performs a two-tailed z-test to determine if a sample mean differs significantly from a hypothesized population mean.‘)
Here we import the Streamlit, NumPy, and SciPy stats libraries, give our app a title, and display a brief description of what it does.
Step 2: Collecting User Inputs
Next, we‘ll create input fields for the user to enter their sample data, hypothesized population mean, and desired significance level:
with st.expander(‘Input Data‘):
    sample_data = st.text_input(‘Enter your sample data (comma-separated):‘, value=‘1, 2, 3, 4, 5‘)
    pop_mean = st.number_input(‘Hypothesized population mean:‘, value=3.0, step=0.1)
    alpha = st.selectbox(‘Significance level:‘, options=[0.01, 0.05, 0.1], index=1)
We use Streamlit‘s st.expander to create a collapsible section for the input fields. This keeps the UI tidy while still allowing the user to adjust the inputs.
The st.text_input accepts the sample data as comma-separated values, while st.number_input and st.selectbox provide fields for the population mean and significance level, respectively.
Step 3: Performing Calculations
With the user inputs collected, we can now perform the necessary calculations for the z-test:
# Convert sample data to NumPy array
sample = np.fromstring(sample_data, sep=‘,‘)

# Get sample statistics
sample_mean = sample.mean()
sample_stdev = sample.std(ddof=1)
n = len(sample)

# Calculate z-statistic and p-value
z_stat, p_value = stats.zscore(sample), stats.norm.sf(abs(z_stat))*2
First we convert the sample data string to a NumPy array for easier manipulation. We then calculate the sample mean, sample standard deviation (using Bessel‘s correction), and sample size.
Finally, we compute the z-statistic using stats.zscore and the p-value using the survival function stats.norm.sf. Since it‘s a two-tailed test, we multiply the one-tailed probability by 2.
Step 4: Displaying Results
Now let‘s display the results of our z-test:
st.subheader(‘Results‘)
st.write(f‘Sample mean: {sample_mean:.3f}‘)
st.write(f‘Sample standard deviation: {sample_stdev:.3f}‘)
st.write(f‘z-statistic: {z_stat:.3f}‘)
st.write(f‘p-value: {p_value:.3f}‘)

# Determine whether to reject null hypothesis
if p_value < alpha:
    st.success(f‘Reject the null hypothesis at α = {alpha}. The sample mean is significantly different from the hypothesized population mean.‘)
else:
    st.info(f‘Fail to reject the null hypothesis at α = {alpha}. The sample mean is not significantly different from the hypothesized population mean.‘)
We use st.write to display the sample statistics, z-statistic, and p-value. Then we compare the p-value to the significance level to determine whether to reject or fail to reject the null hypothesis.
The conclusion is highlighted using color-coded st.success and st.info messages to help it stand out.
Step 5: Adding Visualization
To make the results more interpretable, let‘s add a visualization showing the sample distribution and z-statistic:
import altair as alt

# Create density plot of sample data
sample_plot = alt.Chart(pd.DataFrame(sample, columns=[‘value‘])).transform_density(
    ‘value‘,
    as_=[‘value‘, ‘density‘],
).mark_area().encode(
    x=‘value:Q‘,
    y=‘density:Q‘,
)

# Add vertical line for population mean
pop_mean_line = alt.Chart(pd.DataFrame({‘x‘: [pop_mean]})).mark_rule(color=‘red‘).encode(x=‘x‘)

# Add vertical line for z-statistic
z_stat_line = alt.Chart(pd.DataFrame({‘x‘: [sample_mean + z_stat*sample_stdev/np.sqrt(n)]})).mark_rule(color=‘blue‘, strokeDash=[1, 1]).encode(x=‘x‘)

# Combine plots
st.altair_chart(sample_plot + pop_mean_line + z_stat_line, use_container_width=True)
Here we use the Altair library to create a density plot of the sample data, with vertical lines indicating the population mean (red) and the z-statistic (blue dashed).
The resulting visualization provides a intuitive representation of how far the sample mean deviates from the null hypothesis.
Step 6: Extending the App
There are many ways we could extend and enhance our basic z-test calculator app. Some ideas include:
- Adding support for one-tailed tests
- Allowing the user to specify a custom alternative hypothesis (e.g. sample mean > population mean)
- Implementing power analysis to estimate the minimum sample size for a desired effect size
- Providing an option to upload sample data from a CSV file
- Generating a downloadable report with the test results and visualizations
As an exercise, try implementing one or more of these features on your own!
Best Practices for Streamlit App Development
When building Streamlit apps like our z-test calculator, there are several best practices to keep in mind:
1. Validate user inputs
Always add validation logic and error handling for user inputs to prevent unexpected behavior and provide informative feedback.
2. Use caching for expensive computations
Streamlit‘s @st.cache decorator lets you store the results of expensive function calls so they don‘t need to be recomputed every time the app loads.
3. Break up complex logic into functions
To keep your code readable and maintainable, extract repetitive or complex operations into separate functions.
4. Organize sections with expanders and columns
Take advantage of Streamlit‘s layout primitives like st.expander, st.columns, and st.sidebar to create a clean, organized UI.
5. Include links to external references
If your app deals with complex concepts, include links to relevant documentation, tutorials, or research papers for users who want to learn more.
6. Provide clear instructions
Make sure to include concise, easy-to-follow instructions for each input field and feature in your app.
7. Test with different inputs and edge cases
Thoroughly test your app with a variety of inputs and edge cases to catch any bugs or unexpected behavior.
By following these tips, you can create robust, user-friendly Streamlit apps for all your data science and machine learning projects!
Conclusion and Further Reading
In this tutorial, we learned how to build an interactive z-test calculator app using Streamlit and Python. We covered the key steps of setting up the development environment, accepting user inputs, performing z-test calculations, and visualizing the results.
We also discussed some ways to extend the basic app and shared best practices for Streamlit app development in general. Hopefully this has given you a solid foundation for building your own statistical apps and tools with Streamlit!
If you want to learn more, here are some helpful resources:
- Streamlit documentation
- Hypothesis Testing with Python
- Z-tests and t-tests in Python
- Altair documentation
You can also find the complete source code for this app on GitHub.
Happy Streamlit-ing!


![Claude-Instant-100K vs Claude-2-100K: An In-Depth Comparison [2025]](https://33rdsquare.com/wp-content/uploads/2024/03/20240312064004-65eff8c43fc47.png.webp)
