
Detecting Face Masks in the Era of COVID-19 with Deep Learning and RetinaNet
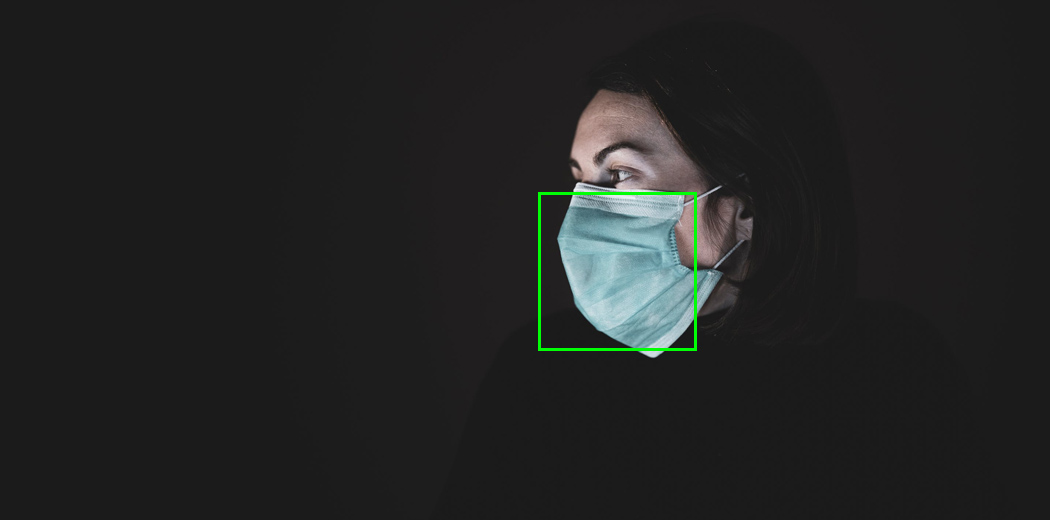
The COVID-19 pandemic has upended daily life across the globe and changed the way we interact with each other. One of the key public health measures recommended by experts is wearing face masks to reduce transmission of the virus^1. Many jurisdictions now mandate the use of masks in public spaces like stores, restaurants, public transit and more.
While most people are complying with mask requirements, monitoring and enforcing mask wearing can be challenging for businesses and government agencies. This is where computer vision and deep learning can help. In this post, we‘ll walk through how to build an automated face mask detection system using the RetinaNet object detection model and the Keras deep learning library.
Why Face Mask Detection Matters
Face masks are one of the most effective tools we have to slow the spread of COVID-19, particularly in indoor settings^2. A recent study found that universal mask wearing could prevent nearly 130,000 deaths in the US alone^3. Ensuring people are consistently wearing masks is thus a public health imperative.
Common places face mask detection can be used include:
- Retailers and grocery stores
- Schools and universities
- Airports and public transportation
- Healthcare facilities
- Manufacturing and meat processing plants
- Office buildings
An automated system can track the percentage of people wearing masks, send alerts when someone isn‘t wearing one, and provide aggregate analytics to decision makers.
A Primer on RetinaNet for Object Detection
Object detection is the computer vision task of localizing and classifying objects in an image. It‘s a key component of many important applications like autonomous vehicles, surveillance systems, and industrial inspection. Popular object detection models include YOLO, SSD, and Faster R-CNN.
In this post we‘ll be using RetinaNet, a single-stage dense object detector developed by Facebook AI Research in 2017^4. RetinaNet is known for its state-of-the-art performance, especially on small objects, while still being efficient enough for real-time inference.
Here‘s a high-level overview of how RetinaNet works:
- A convolutional neural network backbone (usually ResNet) extracts features from the input image
- A Feature Pyramid Network combines features at different scales to handle objects of varying sizes
- A classification subnet predicts the class of each anchor box
- A regression subnet refines the anchor box coordinates
- During training, focal loss is used to focus on hard examples
One of the key insights of RetinaNet is the use of focal loss to address the class imbalance problem in object detection. In a typical image, the vast majority of pixels are background, so the detector needs to be able to ignore a lot of easy negatives to find the rare positive object instances. Focal loss down-weights the contribution of easy examples so the model can focus on learning the hard ones.
RetinaNet has been shown to outperform other popular one-stage detectors like YOLO and SSD on standard benchmark datasets. Here‘s a comparison on the challenging COCO dataset:
| Model | mAP | FPS |
|---|---|---|
| YOLO v2 | 21.6 | 40 |
| SSD513 | 31.2 | 22 |
| RetinaNet-50-500 | 32.5 | 23 |
| RetinaNet-101-500 | 34.4 | 16 |
Source: ^4
RetinaNet achieves a good balance of accuracy and speed, making it a solid choice for a face mask detector that may need to run in real-time.
Building a Face Mask Dataset
To train a supervised model like RetinaNet, we need a dataset of images along with bounding box annotations of the objects of interest – in our case, faces with and without masks.
There are a few open source face mask datasets available like the Real World Masked Face Dataset^5 and the Face Mask Detection Dataset^6. However, you‘ll likely need to collect and annotate your own dataset tailored to your specific use case.
Some things to consider when building a face mask dataset:
- Diversity of faces – different ages, genders, ethnicities, etc.
- Variety of masks – surgical masks, cloth masks, N95 respirators, etc.
- Variety of environments – indoor/outdoor, lighting conditions, camera angles, etc.
- Negatives – include images without masks to reduce false positives
- Size – aim for at least 1000-2000 total annotated images
Once you have a set of images, you‘ll need to annotate the bounding boxes around the faces/masks. A popular open source tool for this is LabelImg^7 which lets you draw boxes and assign class labels.
After you‘ve annotated your images, you need to split the data into train, validation, and test sets. A typical split is 70% train, 20% validation, and 10% test. Make sure to choose splits that cover the diversity in your data.
Finally, make sure to apply data augmentation to your training images to improve robustness. This includes random horizontal flips, rotations, crops, and color jittering. The Keras RetinaNet library provides a number of built-in augmentations.
Training RetinaNet on Face Masks
With our annotated dataset in hand, we‘re ready to train a RetinaNet model. We‘ll use the excellent Keras RetinaNet library which provides a complete training pipeline.
First we need to install the library and its dependencies:
git clone https://github.com/fizyr/keras-retinanet
cd keras-retinanet
pip install .
Next we convert our annotations into the CSV format expected by the train.py script:
image_path,x1,y1,x2,y2,class_nameWe also create a classes.csv file mapping class names to IDs:
mask,0
no_mask,1
Now we‘re ready to kick off the training with a command like:
keras_retinanet/bin/train.py --backbone=resnet50 --steps=500 --epochs=25 csv annotations.csv classes.csv The key flags are:
-
--backbone: The CNN backbone to use. Here we‘re using a ResNet50 which provides a good tradeoff of accuracy and speed. For higher accuracy you can use ResNet101 or ResNet152 at the cost of slower training and inference. -
--steps: The number of training steps per epoch. This should roughly equalnum_training_images / batch_size. -
--epochs: The total number of epochs to train for. Typically you train object detection models for 25-50 epochs.
The trainer outputs a model snapshot after each epoch. To monitor performance, you can run validation on a separate validation set with the evaluate subcommand:
keras_retinanet/bin/evaluate.py --backbone=resnet50 snapshots/resnet50_csv_50.h5 csv val_annotations.csv classes.csvThe key metric for object detection is mean Average Precision (mAP). This averages the precision for each class at different recall thresholds. A perfect detector has a mAP of 100%. For face mask detection, a good target mAP is around 70-80%.
Once training is complete, you can run inference on a new image using the predict subcommand:
keras_retinanet/bin/predict.py --backbone=resnet50 snapshots/resnet50_csv_50.h5 my_image.jpgThis returns a JSON object with the predicted bounding boxes, class labels, and confidence scores. We can visualize the detections using matplotlib:
from matplotlib import pyplot as plt

plt.figure(figsize=(10, 10))
plt.axis(‘off‘)
plt.imshow(plt.imread(‘my_image_with_detections.jpg‘))
plt.show()
And here‘s our example face mask detection!

Pretty cool! The model has successfully detected the mask and no-mask faces in the test image. We can adjust the detection threshold to tune the precision/recall tradeoff for our specific application.
Optimizing Performance
If we‘re not satisfied with the initial performance of our face mask detector, there are a number of things we can try to optimize it.
The first step is to look at the specific types of errors the model is making. Are there certain kinds of masks or angles that are particularly challenging? Maybe the model struggles with detecting masks on children‘s faces. Make note of the common failure modes.
One of the best ways to improve performance is to collect more training data targeting these hard cases. For example, you might deliberately collect more images of kids wearing masks or images with extreme head angles and occlusion.
We can also try fine-tuning the model hyperparameters. Some things to experiment with:
- Learning rate and learning rate schedule
- Anchor box sizes and ratios
- Non-max suppression threshold
- Feature Pyramid Network depth
You may need to train for more epochs to see the full benefit of hyperparameter changes.
If you‘re still not seeing the accuracy you need, you can explore some more advanced techniques:
- Progressive resizing – gradually increase the resolution of the input images over the course of training
- Two-stage training – first train on a large, general dataset like COCO and then fine-tune on your specific domain
- Test-time augmentation – run inference on augmented versions of the test image and average the predictions
- Model ensembling – combine the predictions of multiple models
Deploying a Face Mask Detector in the Real World
Once we have a face mask detector that performs well on our test set, we need to deploy it in the real world to provide value. A common use case is running the detector on a live video stream to monitor mask wearing in real-time.
To run RetinaNet on a video stream, we can use OpenCV to capture frames from a camera, run the model on each frame, and display the annotated frame:
import cv2
from keras_retinanet.utils.image import preprocess_image, resize_image

video = cv2.VideoCapture(0)

while True:
    ret, frame = video.read()
    frame = cv2.cvtColor(frame, cv2.COLOR_BGR2RGB)
    frame = preprocess_image(frame)
    frame, scale = resize_image(frame)
    boxes, scores, labels = model.predict_on_batch(np.expand_dims(frame, axis=0))
    boxes /= scale
    for box, score, label in zip(boxes[0], scores[0], labels[0]):
        if score < 0.5:
            break
        b = box.astype(int)
        cv2.rectangle(frame, (b[0], b[1]), (b[2], b[3]), (0, 255, 0), 2)
        caption = "{} {:.3f}".format(labels_to_names[label], score)
        cv2.putText(frame, caption, (b[0], b[1] - 10), cv2.FONT_HERSHEY_PLAIN, 1.5, (0, 255, 0), 2)
    frame = cv2.cvtColor(frame, cv2.COLOR_RGB2BGR)
    cv2.imshow("Face Mask Detector", frame)
    if cv2.waitKey(1) == ord(‘q‘):
        break

video.release()
cv2.destroyAllWindows()
This captures frames from the default camera, runs face mask detection on each frame, and displays the frame with annotations in real-time.
To optimize inference speed, we can take advantage of the GPU if one is available. The Keras RetinaNet library uses the TensorFlow backend which can run on the GPU if it‘s properly configured.
Another option is to run the model on a separate inference server and send frames over the network for processing. This allows you to centralize the computing power and run detections on multiple video streams simultaneously.
Finally, you‘ll need to consider factors like the camera positioning and resolution to ensure reliable detections. The detector‘s performance will vary based on the specific environment and hardware. It‘s a good idea to pilot the system and collect additional data to fine-tune the model before a full-scale deployment.
Conclusion
In this post we covered how to train a face mask detector using the RetinaNet object detection model and the Keras deep learning library. The key steps are:
- Collecting and annotating a diverse dataset of face mask images
- Configuring a RetinaNet model and training it on the dataset
- Evaluating performance and optimizing the model
- Deploying the model to run detections on a live video stream
Detecting face masks in the real-world is a challenging but important problem in the era of COVID-19. Deep learning models like RetinaNet provide a powerful tool for automating this task at scale. While we focused specifically on face masks, the same approach can be used for other object detection problems in domains like retail, manufacturing, and autonomous vehicles.
Further reading:
- Original RetinaNet paper: Focal Loss for Dense Object Detection
- Facebook AI blog post: Focal Loss: Detecting Objects in Dense Scenes
- Fizyr Keras RetinaNet docs: https://keras-retinanet.readthedocs.io/
References:


