The Ultimate Guide to Data Exploration in Python with NumPy, SciPy, Matplotlib & Pandas
Data exploration is a critical first step in any data science project. Before you start building machine learning models or creating data visualizations to share insights, it‘s essential to develop a thorough understanding of the data you‘re working with.
By taking the time upfront to explore your data in depth, you can surface data quality issues, discover interesting patterns and relationships, inform your feature engineering and modeling decisions downstream, and avoid costly mistakes.
While data exploration can be a time-consuming process, the good news for data scientists is that Python provides a wealth of open source libraries to help make the task easier and more efficient. In particular, NumPy, SciPy, Matplotlib, and Pandas are must-know tools in the data explorer‘s toolkit.
In this guide, we‘ll walk through key data exploration techniques in Python, with code examples featuring these essential libraries. Whether you‘re a data science beginner or a seasoned practitioner looking to deepen your understanding, this resource will equip you with a framework and the practical skills to explore your data with confidence. Let‘s dive in!
Loading Data into Pandas
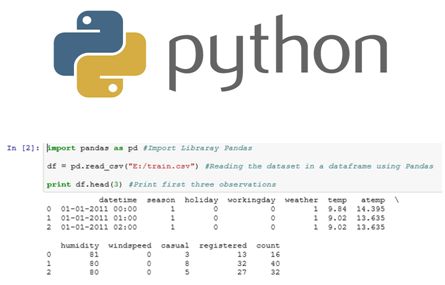
Often the very first step in a data exploration workflow is to load your data into a format suitable for analysis. Pandas is the go-to library in Python for this task, providing a powerful and flexible DataFrame object to manipulate, reshape and analyze structured data.
With Pandas, you can easily load data into a DataFrame from a variety of flat file formats like CSV and Excel, as well as SQL databases and web APIs. Here are a few examples:
import pandas as pd

# Load data from a CSV file
df = pd.read_csv(‘data.csv‘)

# Load data from an Excel spreadsheet
df = pd.read_excel(‘data.xlsx‘, sheet_name=‘Sheet1‘)

# Load data from a SQL database
import sqlite3
conn = sqlite3.connect(‘database.db‘)
df = pd.read_sql_query("SELECT * FROM table_name", conn)
Pandas provides a range of parameters to specify things like column data types, how to parse dates, and how to handle missing values when loading data. It‘s worthwhile to spend time upfront to ensure your data is loaded correctly before proceeding to exploration.
Inspecting and Cleaning Data
With your data loaded into a DataFrame, the next step is typically to inspect and clean the data. This may involve:
- Viewing the first and last rows of the DataFrame with
df.head()anddf.tail() - Checking the dimensions of the DataFrame with
df.shape - Examining the data types of each column with
df.info() - Looking for missing values with
df.isnull().sum() - Calculating summary statistics on numeric columns with
df.describe()
Pandas provides many convenient methods for handling common data cleaning tasks, such as:
- Removing duplicates:
df.drop_duplicates() - Renaming columns:
df.rename(columns={‘old_name‘: ‘new_name‘}) - Replacing missing values:
df.fillna(0) - Converting data types:
df[‘col‘] = df[‘col‘].astype(int)
Investing time to properly clean and wrangle your data upfront can save you major headaches later on in your analysis. Always be sure to document any cleaning steps and transformations made to the original data.
Examining Distributions and Summary Statistics
With a clean dataset in hand, you can begin to explore the distributions and summary statistics of individual variables. Understanding the central tendency, dispersion and shape of your data is key to selecting appropriate analysis methods down the line.
NumPy and SciPy provide a range of tools for calculating summary statistics:
import numpy as np
from scipy import stats

# Calculate mean, median, min, max
mean = np.mean(df[‘col‘])
median = np.median(df[‘col‘])
min_val = np.min(df[‘col‘])
max_val = np.max(df[‘col‘])

# Calculate variance and standard deviation
var = np.var(df[‘col‘])
std = np.std(df[‘col‘])

# Calculate skewness and kurtosis
skew = stats.skew(df[‘col‘])
kurt = stats.kurtosis(df[‘col‘])
To visually explore distributions, histograms and box plots are simple yet effective. Matplotlib provides the building blocks for creating these charts:
import matplotlib.pyplot as plt

# Create a histogram
plt.hist(df[‘col‘])
plt.title(‘Histogram of Column‘)
plt.xlabel(‘Value‘)
plt.ylabel(‘Frequency‘)
plt.show()

# Create a box plot
plt.figure(figsize=(5,5))
plt.boxplot(df[‘col‘])
plt.title(‘Box Plot of Column‘)
plt.show()
Analyzing distributions can help you identify potential outliers or data quality issues that require further investigation. Substantial deviations from an expected distribution may also suggest the need for transformations prior to modeling.
Visualizing Relationships Between Variables
Beyond individual variable distributions, a key goal of exploration is to uncover and visualize relationships between different variables in your dataset.
Scatter plots are a classic way to examine the relationship between two continuous variables. With Matplotlib, creating a scatter plot is straightforward:
# Create a scatter plot
plt.figure(figsize=(5,5))
plt.scatter(df[‘col1‘], df[‘col2‘])
plt.title(‘Scatter Plot of Col1 vs Col2‘)
plt.xlabel(‘Col1‘)
plt.ylabel(‘Col2‘)
plt.show()
To quantify the strength of a linear relationship, you can calculate the correlation coefficient:
# Calculate the Pearson correlation coefficient
r = stats.pearsonr(df[‘col1‘], df[‘col2‘])
print(f"Pearson correlation: {round(r[0],2)}")
For exploring relationships between categorical variables, contingency tables and heatmaps are useful. These can be generated easily with Pandas:
# Create a contingency table
cont_table = pd.crosstab(df[‘cat_var1‘], df[‘cat_var2‘])

# Create a heatmap
plt.figure(figsize=(8,5))
sns.heatmap(cont_table, annot=True, fmt=‘d‘, cmap="YlGnTl")
plt.show()
Examining relationships between variables can help inform your feature engineering decisions and suggest important interaction terms to include in models. Visualizations are also a powerful way to communicate insights to stakeholders.
Reshaping, Merging and Sampling Datasets
As you explore your data, you may need to reshape, merge or sample your dataset into different forms to enable the types of analysis you want to perform.
Pandas provides a flexible suite of functions for molding your DataFrame into different configurations:
# Transpose columns and rows
df_transposed = df.T

# Pivot a DataFrame
df_pivot = df.pivot_table(index=‘col1‘, columns=‘col2‘, values=‘col3‘)

# Melt a DataFrame from wide to long format
df_melted = pd.melt(df, id_vars=[‘id‘], value_vars=[‘col1‘, ‘col2‘])

# Merge DataFrames together
df_merged = pd.merge(df1, df2, on=‘common_col‘)

# Concatenate DataFrames vertically
df_concat = pd.concat([df1, df2])

# Sample rows from a DataFrame
df_sample = df.sample(n=100, random_state=42)
Being able to flexibly reshape your data is an essential skill for a data explorer. If your data is not in a format conducive to the analysis at hand, it‘s important to know how to rearrange it programmatically.
Putting It All Together: A Real-World Example
To tie together the concepts we‘ve covered, let‘s walk through a realistic data exploration workflow using a public dataset.
We‘ll use the popular Titanic dataset, which contains information about passengers aboard the Titanic, including their demographics, cabin class, and whether they survived or not. Our goal will be to explore the data to identify factors associated with passenger survival.
First, we‘ll load the data into a DataFrame and inspect it:
df = pd.read_csv(‘titanic.csv‘)

# View first 5 rows
print(df.head())

# Check dimensions
print(f"Dimensions: {df.shape}")

# Check data types and missing values
print(df.info())
Next, we‘ll clean the data by removing unnecessary columns, handling missing values, and converting columns to appropriate data types:
# Drop unnecessary columns
df = df.drop([‘PassengerId‘, ‘Name‘, ‘Ticket‘, ‘Cabin‘], axis=1)

# Replace missing Age values with median age
median_age = df[‘Age‘].median()
df[‘Age‘] = df[‘Age‘].fillna(median_age)

# Convert Pclass to categorical
df[‘Pclass‘] = df[‘Pclass‘].astype(‘category‘)
With our data cleaned, let‘s examine the distributions of key variables:
# Plot histograms of Age and Fare
fig, axs = plt.subplots(1, 2, figsize=(10,5))
axs[0].hist(df[‘Age‘])
axs[0].set_title(‘Distribution of Age‘)
axs[1].hist(df[‘Fare‘])
axs[1].set_title(‘Distribution of Fare‘)
plt.tight_layout()
plt.show()

# View summary statistics
print(df.describe())
To explore relationships between variables, we can create visualizations and pivot tables:
# Create a scatter plot of Age vs Fare
plt.figure(figsize=(8,5))
sns.scatterplot(x=‘Age‘, y=‘Fare‘, data=df)
plt.title(‘Age vs Fare‘)
plt.show()

# Create a contingency table of Pclass vs Survived
cont_table = pd.crosstab(df[‘Pclass‘], df[‘Survived‘])
print(cont_table)

# Create a bar plot of survival rate by Pclass
plt.figure(figsize=(8,5))
sns.barplot(x=‘Pclass‘, y=‘Survived‘, data=df)
plt.title(‘Survival Rate by Passenger Class‘)
plt.ylim(0,1)
plt.show()
From our explorations, we might observe that:
- Age and Fare have right-skewed distributions
- There doesn‘t appear to be a strong relationship between Age and Fare
- Passengers in higher classes had substantially higher survival rates
These insights could inform our feature engineering and modeling approach if we were to go on to build a predictive model for survival.
Of course, this is a simplistic example, but it illustrates a realistic data exploration workflow moving from data loading, to cleaning, to visualization, to insight generation. The specifics will vary depending on your dataset and analytical goals, but the general process is widely applicable.
Conclusion
We‘ve covered a lot of ground in this guide, but hopefully you now have a solid understanding of the key steps and techniques involved in exploring a dataset using Python.
As we‘ve seen, the NumPy, SciPy, Matplotlib, and Pandas libraries provide an extensive set of tools for loading, reshaping, visualizing, and deriving insights from your data – all with concise and expressive code. While we‘ve only scratched the surface of what‘s possible with these libraries, the concepts and code samples covered here should give you a strong foundation to build upon.
Data exploration is a critical skill for any data scientist to master, as the quality of insights you can derive from your data depends heavily on how well you understand it. By investing time upfront to thoroughly explore your data, you can uncover hidden patterns, diagnose data quality issues, and inform your downstream analytical decisions.
Additional Resources
To learn more about data exploration and analysis in Python, check out the following resources:
- Official Pandas documentation
- SciPy statistics documentation
- Matplotlib tutorial
- Seaborn statistical data visualization
- Exploratory Data Analysis Tutorial on Datacamp
Now it‘s your turn – load up a new dataset and start exploring! The insights are out there waiting to be discovered.