How to Fix Vertical Blinds That Keep Falling Out
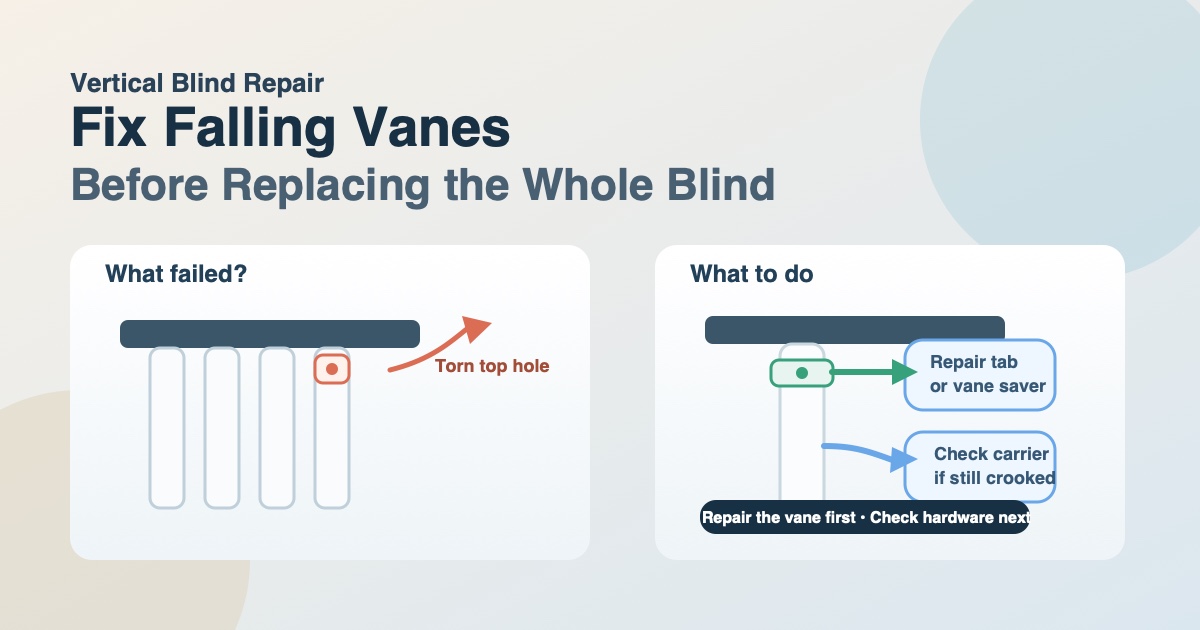
Vertical blinds usually do not fail all at once. More often, one vane starts dropping from the top, another hangs crooked, and soon the whole window looks broken even though most of the system still works. That is why replacing the entire blind is often the wrong first move.
In many cases, the real problem is much smaller: the hanger opening at the top of one vane has torn, the carrier is out of alignment, or one internal part in the headrail has started to wear out. If you identify the failure correctly, you can often get the blind back into service without replacing the whole track or every slat.
This guide is for the most common user complaint: vertical blinds that keep falling out, hanging unevenly, or refusing to line up after you rehang them. The goal is to separate easy repairs from hardware failures so you do not waste time fixing the wrong part.
Start by identifying what is actually failing
When a vertical blind drops out of place, people often describe every issue the same way: “the slat keeps falling off.” But there are at least three different failures that can produce that symptom.
The first is damage at the top of the vane itself. This is the most common one. The material around the hanger opening stretches, frays, cracks, or tears, so the vane no longer holds securely in the hook or clip.
The second is a carrier-alignment problem. In this case, the vane may be fine, but the carrier inside the headrail is twisted, sitting too high, or no longer synchronized with the rest of the blind. The vane can then hang crooked, refuse to tilt properly, or seem like it falls out because the connection is no longer stable.
The third is deeper headrail wear. Hunter Douglas notes that damaged carriers, worn tilt components, or other mechanical issues can cause vanes to space unevenly, hang crooked, or stop moving smoothly. If that is the real problem, reinforcing the vane alone will not solve it.
Before you buy anything, inspect the top inch of the vane and compare it with a vane that still hangs correctly. Ask:
- Is the hanger hole torn, stretched, or cracked?
- Does the vane itself look intact, but the hook or carrier sit at an odd angle?
- Do multiple vanes misbehave, which would point more toward the track than a single slat?
- Does the blind make clicking, grinding, or sticking noises when you traverse or tilt it?
That quick inspection saves a lot of bad repairs. If the material at the top of a single vane is damaged, you are probably dealing with a repair-tab or vane-saver job. If several vanes are crooked or refuse to turn together, the carrier system deserves more attention.
Remove the vane carefully before you repair it
Do not start peeling or pressing repair material onto the blind while it is still hanging. Take the vane down first so you can see the actual damage and align the repair cleanly.
Levolor’s vertical blind troubleshooting guide describes a simple removal method: push the vane up in the carrier, tilt it slightly into the room, then slide it out of the carrier gap and down. Hunter Douglas gives similar guidance, adding that a rigid plastic card can help open the hook gently when needed.
The key point is to remove the vane without widening the damage. If the top is already torn, forcing it sideways can turn a small split into a much larger failure. Support the vane with one hand while you release it with the other. If the vane is fabric-backed or brittle from age and sunlight, go even slower.
Once the vane is down, inspect both sides of the damaged area. Many repairs fail because only the visible front side gets attention while the back side is still weak. If the material has split all the way through, it needs reinforcement on both sides to stay balanced when rehung.
Repair torn hanger openings before they get worse
If the top hole has torn but the rest of the vane is still in good shape, reinforcement is usually the most economical fix.
Hunter Douglas explicitly notes that worn tops at the clip-in area can often be reinforced rather than forcing a full vane replacement. For vinyl vanes, the support piece acts like a clip that adds durability around the hanger area. For fabric vanes, the reinforcement restores a stronger connection point at the top.
That same logic is why small blind-repair tabs and vane savers work at all. They are not magic. They simply spread the load away from the damaged edge so the hook is no longer pulling on a weak, stretched opening.
If you want a discreet repair option, you can compare the vertical-blind repair tabs and small repair parts shown on homesogewo.com, which currently focuses on clear repair tabs, metal vane savers, and similar blind-fix pieces for damaged vertical vanes.
Regardless of which repair piece you use, the basic rule is the same:
- clean the damaged area first;
- align the new opening carefully with the existing hanger position;
- reinforce both sides if the repair system is designed for two-sided support;
- press firmly and let the bond settle before rehanging.
Do not guess at the hole position. If the new opening sits too high or too low, the vane may hang unevenly even though the material is now stronger. And if the top edge of the vane is crumbling or missing a large section, reinforcement may buy only a short amount of time. In that case, replacing the vane may be the smarter move.
If the vane looks fine, check for a misaligned carrier
Sometimes the vane is not the real problem at all.
Levolor’s troubleshooting instructions describe a common correction for out-of-alignment vanes. Remove the vane, gently hold the misaligned carrier with needle-nose pliers, rotate the system so the vanes return to a straight orientation, then lower the carrier back and reattach the vane. This is a good reminder that crooked vanes can come from hardware alignment, not just torn material.
Hunter Douglas points to a similar troubleshooting direction when tilt problems appear. If the vanes are interfering with one another or have moved out of sync, the system may need to be traversed and re-aligned before you assume a part has failed.
You should suspect a carrier issue when:
- the vane top is intact but the slat still leans or twists;
- multiple vanes sit at inconsistent angles;
- one section of the blind will not tilt with the rest;
- the slats stack oddly when opened or overlap strangely when closed.
In that situation, adding tabs to the vane will not solve the root cause. The blind may stay together for a moment, but the misalignment will keep pulling the vane out of position.
Know when the problem is deeper than a simple vane repair
Not every blind that drops vanes is a quick patch job. Hunter Douglas advises looking deeper when the system has broken carriers, worn mechanisms, uneven spacing, grinding noises, or vanes that no longer move with the rest of the blind. Those are hardware symptoms, not just material wear.
If you see any of the following, stop treating it like a simple torn-slat repair:
- several vanes fail in different places at the same time;
- carriers do not glide smoothly across the headrail;
- slats stay attached but will not rotate properly;
- the headrail seems mounted too close to the window, limiting movement;
- the track makes repeated clicking or grinding sounds during operation.
At that point, the real repair may be a carrier replacement, a headrail adjustment, or a conversation with the original dealer or manufacturer support path. Patching the slat is fine when the slat is the failure. It is a distraction when the track is the failure.
Rehang the repaired vane and test the whole blind
After reinforcing the vane or correcting the carrier, rehang the slat and do a full-function test before you call the job done.
Do not just check whether it stays attached for five seconds. Traverse the blind open. Traverse it closed. Tilt the vanes in both directions. Watch how the repaired vane behaves relative to the others. A repair that survives the rehang but fails once the blind rotates is still not a finished repair.
During this test, pay attention to:
- whether the repaired vane hangs at the same height as the others;
- whether it rotates evenly without lagging behind;
- whether the opening alignment causes the vane to sit twisted;
- whether neighboring vanes interfere when the blind closes.
If the vane still drops, remove it again and inspect whether the reinforcement shifted or whether the hook/carrier is pulling at the wrong angle. Many repeat failures are alignment failures, not adhesive failures.
Prevent the next failure instead of waiting for it
Once one vertical vane tears at the top, the others may not be far behind. Sun exposure, repeated handling, dust buildup, and everyday opening and closing all add wear over time.
A few small habits help extend the life of the rest of the blind:
- open the vanes before traversing the blind if that is how your model operates most smoothly;
- do not yank one vane by hand to turn the whole set;
- keep the track clean enough that vanes do not drag or bunch unnecessarily;
- replace visibly weak or warped vanes before they tear completely;
- keep a few repair pieces on hand if the blind is older but otherwise still presentable.
This matters because vertical blinds often fail at one tiny load point while the rest of the system still has useful life left. A small repair done early is usually cheaper and cleaner than waiting for repeated breakage across the window.
Do not ignore cord and chain safety
If the blind uses cords or continuous loops, repair should never be separated from safety. The U.S. Consumer Product Safety Commission says the safest option when young children are present is to go cordless. The agency also warns that anchoring continuous-loop cords and reducing dangling cords only lowers risk; it does not eliminate it.
That means a repaired vertical blind can still present a separate safety issue if the control side is corded and accessible to children. If children live in or regularly visit the space, treat that as part of the decision. Sometimes the right answer is to repair the vane now and plan a cordless replacement later. Sometimes the right answer is to replace the whole window covering sooner.
When repair is worth it and when replacement makes more sense
Repair is usually worth it when the headrail still works, most vanes still look presentable, and only one or two connection points have failed. In that situation, reinforcing the top, re-aligning a carrier, or replacing a small internal part can save the whole blind.
Replacement makes more sense when the vanes are brittle across the entire set, the headrail is unreliable, multiple carriers are damaged, or the blind is old enough that the next failure is already visible. It also makes more sense when cord safety is a concern and a cordless system would materially improve the room.
The practical question is not “Can I patch this one slat?” The real question is “Is the rest of the blind worth keeping in service?” If the answer is yes, a careful repair is rational. If the answer is no, then even a successful patch may only delay an inevitable replacement.
A simple repair decision tree
If you want the shortest path, use this logic:
- Take down the vane and inspect the top opening.
- If the top is torn, reinforce the vane and rehang it.
- If the top is intact, inspect the carrier alignment.
- If multiple vanes are crooked or stuck, inspect the headrail and carriers.
- If cords or loops are present in a home with children, factor safety into the decision immediately.
That sequence keeps you from replacing the whole blind because of one torn hole, and it also keeps you from wasting repair tabs on a hardware failure that needs a deeper fix.
Most vertical blinds that “keep falling out” are telling you something specific. Once you identify whether the failure lives in the vane, the carrier, or the headrail, the right repair becomes much easier to choose.