How to Train YOLOv7 for Custom Object Detection: The Ultimate Guide
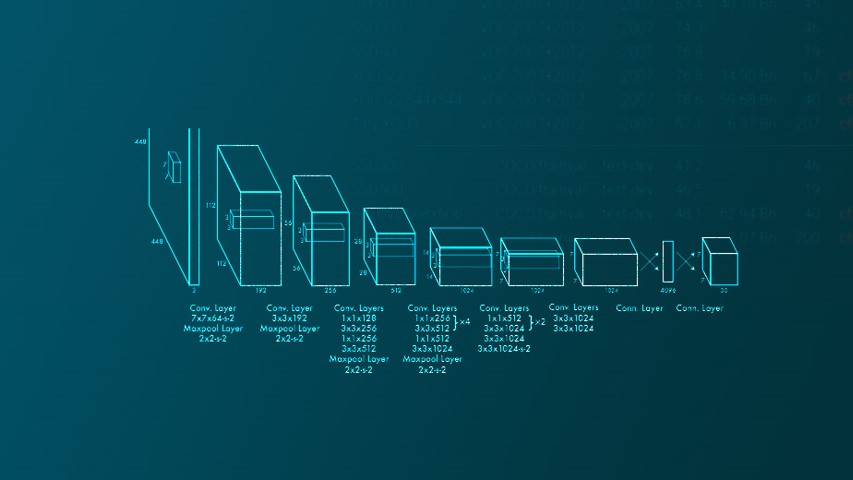
Object detection is one of the most widely used applications of computer vision, with use cases ranging from counting objects in manufacturing to detecting pedestrians for self-driving cars. Many different deep learning object detection architectures have been developed over the years, but the YOLO (You Only Look Once) family of models has consistently been one of the fastest and most popular.
YOLOv7, released in 2022, is the latest and greatest version of YOLO. It builds on the innovations of previous iterations while introducing new optimizations to further improve speed and accuracy. In this comprehensive guide, we‘ll walk through how to train your own custom YOLOv7 model step-by-step so you can apply cutting-edge object detection to your own domain and use case.
What Makes YOLOv7 State-of-the-Art for Object Detection?
Before diving into the training process, let‘s take a quick look at what sets YOLOv7 apart from other object detection models and previous versions of YOLO.
The key characteristics of YOLOv7 include:
-
Anchor-free detection: Earlier YOLO models used preset anchor boxes and predicted offsets relative to those anchors. YOLOv7 directly predicts bounding boxes at each location without relying on anchors, simplifying the architecture.
-
Model scaling: YOLOv7 includes a set of models that scale up and down in size and complexity. This allows you to easily tradeoff between speed and accuracy for your application.
-
Efficient backbones: YOLOv7 utilizes the new ELAN (Efficient Layer Aggregation Network) backbone architectures which provide a strong balance of accuracy and latency.
-
Planned re-parameterized convolution: A new kind of convolution layer that increases training stability and accuracy without extra computation cost.
-
Coarse-to-fine feature pyramids: YOLOv7 builds feature pyramids with both top-down and bottom-up connections, allowing it to effectively combine coarse semantic information with fine-grained details.
Compared to the popular YOLOv5 model, YOLOv7 can achieve higher accuracy while running faster. It also outperforms other state-of-the-art object detection models like YOLOX and Scaled-YOLOv4 on standard speed/accuracy benchmarks.
Now that we understand what makes YOLOv7 a powerful choice for object detection, let‘s get started with training it on a custom dataset.
Step 1: Prepare Your Dataset
The first step in training any custom object detection model is putting together a high-quality dataset. Your dataset should be representative of what your model will encounter when deployed in the real world.
Some best practices for dataset collection include:
- Gather images from diverse scenarios, camera angles, object sizes, lighting conditions, etc. The more variation, the more robust your model will be.
- Aim to collect at least 1000-2000 annotated images per class for a strong model. You may be able to get away with less for simpler problems.
- Ensure your images are clear and high resolution. Avoid excessive blur, occlusion, or tiny objects.
- Consider using data augmentation to expand your dataset. Techniques like flips, rotations, and color jittering can help teach your model to be invariant to those factors.
Once you have your images, you need to annotate them with bounding boxes around each object of interest. You can use a tool like LabelImg, RectLabel, or Roboflow Annotate to easily draw the boxes and export the annotations in YOLO format.
The YOLO format stores annotations in a text file for each image with one row per object. Each row contains the object class as an index number and the bounding box coordinates normalized to [0,1]. Here‘s an example:
0 0.51231 0.902911 0.312 0.42212
1 0.612656 0.510101 0.121233 0.209123
When your dataset is annotated, place the images and label files in a folder structure like this:
/dataset
/images
img001.jpg
img002.jpg
…
/labels
img001.txt
img002.txt
…
Step 2: Install YOLOv7 Dependencies
With your dataset ready, it‘s time to set up YOLOv7 on your machine or cloud instance. YOLOv7 is implemented in PyTorch, so you‘ll need to install PyTorch first following the instructions for your platform: https://pytorch.org/get-started/locally/
Then clone the official YOLOv7 repo and install the required Python packages:
git clone https://github.com/WongKinYiu/yolov7.git
cd yolov7
pip install -r requirements.txt
YOLOv7 provides a pretrained model checkpoint that is useful for fine-tuning. Download it with:
wget https://github.com/WongKinYiu/yolov7/releases/download/v0.1/yolov7.pt
Step 3: Prepare YOLOv7 Configuration Files
Next we need to set up some configuration files that specify our dataset and model parameters. YOLOv7 looks for a YAML file describing the dataset and a TXT file listing the class names.
Create a new file called data/custom.yaml with this content:
train: /path/to/your/dataset/images/train/
val: /path/to/your/dataset/images/val/
nc:
names: [‘class1‘, ‘class2‘, …]
/path/to/your/dataset should be replaced with the directory holding your dataset. is an integer of how many distinct object classes you have. The names list contains the string name of each class in order.
Next create a file called data/custom.txt that just lists your class names one per line:
class1
class2
…
Step 4: Run YOLOv7 Training
We‘re now ready to start the training process. Run this command to kick off training:
python train.py –workers 1 –device 0 –batch-size 16 –epochs 100 –img 640 640 –data data/custom.yaml –hyp data/hyp.scratch.custom.yaml –cfg cfg/training/yolov7.yaml –name yolov7-custom –weights yolov7.pt
Set –workers to the number of CPU cores you have available. –device specifies which GPU to use if you have multiple (default is 0). The –img flag sets the image size YOLOv7 will resize to during training. Larger sizes will be more accurate but train slower.
The –hyp flag points to a YAML file containing training hyperparameters. You can tweak these to optimize training for your task. See the official repo for details on each hyperparameter.
As training progresses, you‘ll see updates printed on the Average Precision (AP) for each class, mean AP across all classes (mAP), precision, recall, and other metrics. The weights for the best performing epoch will be saved under runs/train/yolov7-custom/weights/best.pt.
Step 5: Evaluate Your Trained YOLOv7 Model
After training finishes, you can run an evaluation on the validation set to assess final model performance:
python test.py –data data/custom.yaml –img 640 –batch 16 –conf 0.001 –iou 0.65 –device 0 –weights runs/train/yolov7-custom/weights/best.pt –name yolov7-custom
This will generate a performance report showing the mAP and AP at different IoU thresholds. The [email protected] (IoU threshold of 0.5) is a common overall metric.
To visualize your model‘s predictions, run:
python detect.py –weights runs/train/yolov7-custom/weights/best.pt –img 640 –conf 0.25 –source /path/to/your/test/images
The detect.py script will run your model on each image in the supplied directory and save the annotated images showing detected objects.
Tips for Training YOLOv7
Here are some tips to keep in mind as you work with YOLOv7:
- Ensure your dataset has tight bounding boxes. Too much background included in boxes can confuse the model.
- Use as high resolution images as you can while still maintaining a batch size of at least 8-16. Small batch sizes can cause unstable training.
- Train for enough epochs that you see the losses plateau and the mAP stop increasing. For complex datasets this may take hundreds of epochs.
- If you run into out-of-memory errors, try reducing the image size, batch size, or number of workers.
- Data augmentation is your friend! The built-in YOLOv7 augmentations work well, and you can enable mosaic augmentation for even more variability.
Putting Your Custom YOLOv7 Model to Work
Congrats, you‘ve now trained a state-of-the-art object detector tailored to your exact use case! You can integrate your saved model weights into your production pipeline to detect objects via the YOLOv7 PyTorch or OpenCV inference APIs.
Some exciting applications for custom YOLOv7 models include:
- Detecting manufacturing defects or counting items in an industrial setting
- Monitoring shelves to track inventory in a retail store
- Locating pedestrians, vehicles, road signs and more for autonomous driving
- Analyzing aerial imagery to map buildings or natural resources
- Finding and identifying animals in conservation research
The possibilities are virtually endless. The performance and flexibility of YOLOv7 make it a great choice for a wide range of object detection needs.
Frequently Asked Questions
Q: Do I need a powerful GPU to train YOLOv7?
A: A GPU will greatly accelerate training, but you can train on a CPU if needed. Just expect it to be much slower. A GPU with at least 8GB VRAM is ideal.
Q: Can I use YOLOv7 for non-object-detection tasks?
A: Yes, YOLOv7 can also be used for related tasks like instance segmentation by adding a mask head to the network. The core architecture is flexible.
Q: How long does it take to train YOLOv7?
A: Training time depends on your dataset size, complexity, and compute power. As a ballpark, a model with 3-5 classes may take a few hours on a modern GPU while a model with 50+ classes could take a day or more. Be patient!
Q: What if my model isn‘t converging?
A: Double check that your dataset is high quality and your annotations are correct. Make sure you‘re training long enough and the learning rate isn‘t too high. You can also try different model scales or YOLOv7 variants.
Q: How do I deploy my trained YOLOv7 model?
A: Export your model to ONNX format for deployment to many common inference environments. You can also use the PyTorch JIT compiler to optimize the model for your production stack.
With YOLOv7 and a solid dataset, you‘re well equipped to tackle nearly any object detection challenge. Go forth and build amazing custom object detectors!